
After years of expecting failure at making yeast doughs, I finally decided to sign up for a Bread Making class that has been on my Amazon wish list for many years. Proofing yeast always seemed like more trouble than its worth and then watching my dough not rise made me opt for a bread machine. The added bonus that the bread machine made a loaf of bread in 58 minutes, which was much less than the 3 hour time needed for homemade bread, meant buying a bread machine a winner for me.
I’ve long been a fan of King Arthur Flour’s brand of flours since attending a demo where everyone was given all types of flours to take home. Its hard to describe flour as “not floury”, but that’s the best explanation I could find. The flours are light and doesn’t taste or feel like other brands. I signed up for the 4-day Bread: Principles & Practice course which covered White dough, Whole Grain, Sweet Dough and French Bread Dough. Over the four days we learned to knead and shape different doughs as well as the science behind kneading doughs and the role each ingredient plays in the process. I had so much bread that I had to give it away to the staff at the hotel and random people I met.
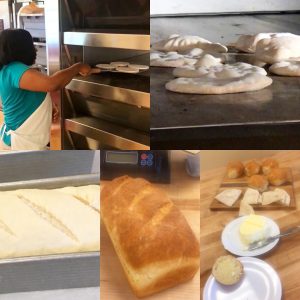
Day 1 – Lean Doughs
Day 1 – Lean Doughs
Lean doughs are basic doughs which use flour, salt and yeast. We covered kneading the dough and weighing the ingredients. We learned to shape dough into rolls and loaves as well as how to make pita bread. I never would have thought that pita bread was so easy to make. We were also shown how to use the dough blade to make the designer slits in the dough before baking.
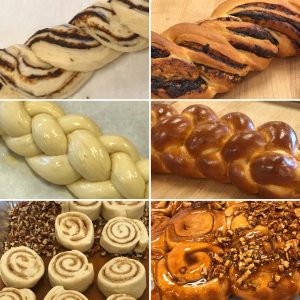
Day 2 – Enriched Dough
Day 2 – Enriched Doughs
Enriched doughs have added ingredients like eggs as well as more butter and/or milk than lean doughs. I’m proud of my ability to do a 6 strand braid and a twist. My twist was filled with a prune puree which was absolutely yummy. Two lucky women at Washington Park receive the pan of hot cinnamon buns.
Day 3 – Whole Grains
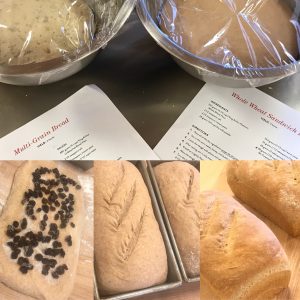
Day 3 – Whole Grains
At the end of day two we prepped the Soaker for the Multi-Gran bread we would make. The Soaker was a mix of water and multi-grains which was left overnight to ferment. During the class the other ingredients were added and we learned how to shape the dough into french boules. I need to practice this method of pulling the dough into the boule shape. The Whole Wheat dough was shaped into raisin filled loves which was delightful due to the sweetness of raisins balancing the strong taste of wheat.
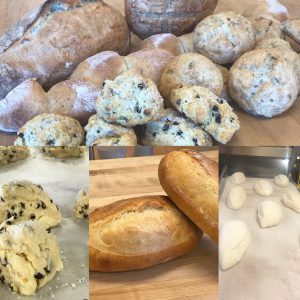
Day 4 – French Dough
Day 4 – Pre-ferments
Again at the end of the previous day we prepped the Poolish used to make the french dough. The poolish consisted of flour, water and a pinch of yeast. It was then added to the dough that was shaped into batards and baguettes. Also on the menu for the final day was Black Currant Scones which didn’t require much prep and were a great snack to end the day.
Back at home I set out to make my 1st loaves and out of pure laziness (and I really thought it would fit), I decided to try to use my large toaster oven to bake one of the loaves of bread. Suffice it to say, the oven was too small and the dough rose even more and touched the top element. Baking had to be completed in the regular oven. Looks aside, the bread did come out as expected inside and tasted good. Ha! Good excuse to buy a new oven. The hunt is on for a large counter top convention oven. Wish me luck.
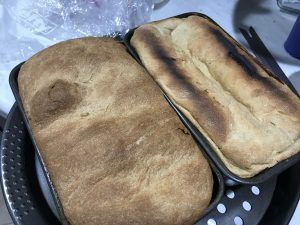
1st Try at Home
Tips Learned
- It is better to weigh the ingredients (including liquid ingredients) instead of using volume. Makes it easier to double and half recipes as well.
- Instant yeast doesn’t need to be proofed and can be added to dry ingredients (YAY!). Goodbye Active Dry Yeast.
- Yeast dough ferment best between 76 and 78 degrees F.
- Whole Grains need more water
